What is HTML?
In order to begin to
write HTML, it helps if you know what you are writing.
HTML is the language in which most websites are written.
HTML is used to create pages and make them functional.
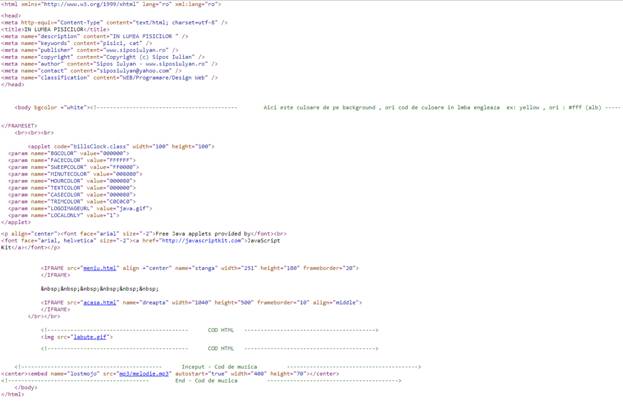
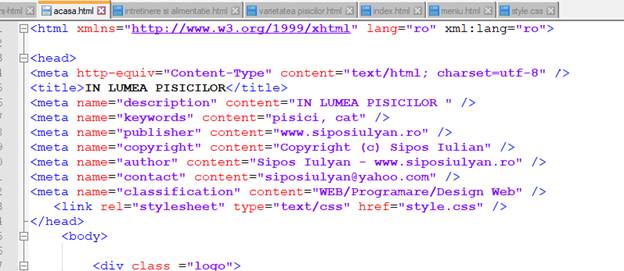
Source cod in HTML from www.digit-platform.ro
The code used to make
them visually appealing is known as CSS and we shall focus on this in a later
tutorial. For now, we will focus on teaching
you how to build rather than design.
The History of HTML
HTML was first created
by Tim Berners-Lee, Robert Cailliau,
and others starting in 1989. It
stands for Hyper Text Markup Language.
Hypertext
means that the document contains links that allow the reader to jump to other
places in the document or to another document altogether. The latest version is
known as HTML5.
A Markup Language is a
way that computers speak to each other to control how text is processed and
presented. To do this HTML uses two things: tags and attributes.
Tags and Attributes
What are Tags and Attributes?
Tags and attributes
are the basis of HTML.
They work together but
perform different functions – it is worth investing 2 minutes in differentiating the two.
What Are HTML Tags?
Tags are used to mark
up the start of an HTML element and they are usually enclosed in angle
brackets. An example of a tag is: <h1>.
Most tags must be
opened <h1> and closed </h1> in order to function.
Examples:

What
are HTML Attributes?
Attributes contain additional pieces of information.
Attributes take the form of an opening tag and additional info is placed
inside.
An example of an attribute is:

In this instance, the image source (src) and the alt
text (alt) are attributes of the <img> tag.
Golden
Rules To Remember
The vast majority of tags must be opened (<tag>) and closed (</tag>)
with the element information such as a title or text resting between the tags.
When using multiple tags, the tags must be closed in
the order in which they were opened. For example:
<strong><em>This is really
important!</em></strong>
HTML
Editors
Now that we’ve gotten the basic theory out of the way.
It’s time to learn how to build our first website.
First off, we must ensure that we have the right tools.
Most important, we need an HTML editor.
There are many choices on the market. Here are a
handful of the most popular:
·
Sublime Text 3
·
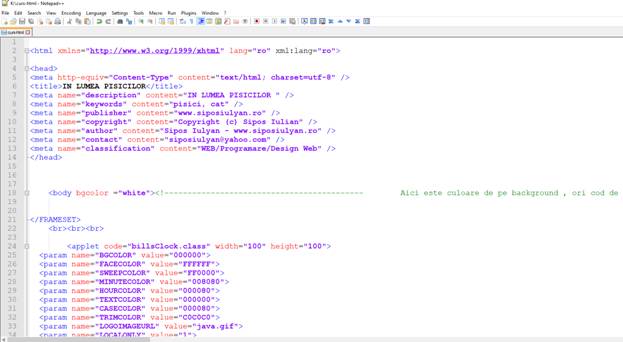
Notepad ++
·
Komodo Edit
·
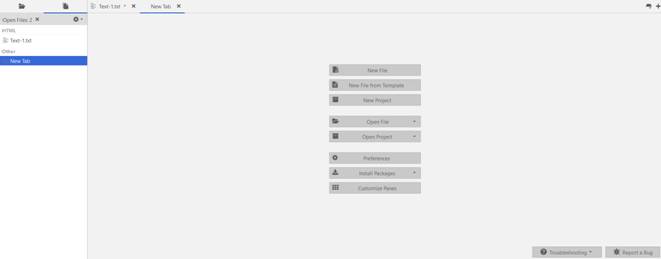
Visual Code
Sublime Text 3
However, for this tutorial, we will use the Sublime Text 3 as it is free and
also offers cross-platform support for Windows, Mac, and Linux users.
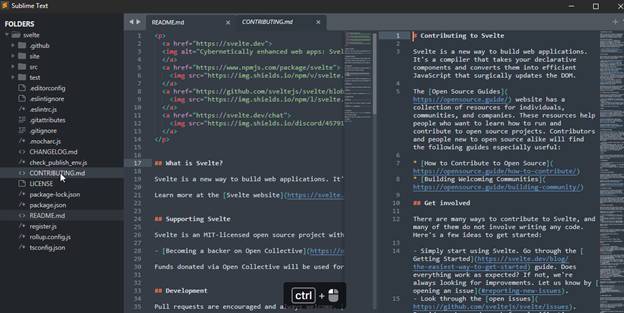
Sublime Text 3 has a mini-preview
window on the right.
Pros
·
Easily customizable
·
Beginner-friendly
·
Pleasant color schemes
to choose from.
·
Sublime Text can now
utilize your GPU on Linux, Mac and Windows when rendering the interface. This
results in a fluid UI all the way up to 8K resolutions, all while using less
power than before.
·
The Default and Adaptive
themes have been refreshed with new tab styles and inactive pane dimming.
Themes and Color Schemes support auto dark-mode switching. The Adaptive theme
on Windows and Linux now features custom title bars.
·
Support for one of the
most popular new programming languages is now shipped by default. Utilize all
of the smart syntax-based features of Sublime Text within the modern JavaScript
ecosystem.
·
The syntax highlighting
engine has been significantly improved, with new features like handling
non-deterministic grammars, multi-line constructs, lazy embeds and syntax
inheritance. Memory usage has been reduced, and load times are faster than
ever.
Cons
·
Can’t print documents or
code
·
No toolbar or dashboard
available.
Notepad ++
Notepad++ is a free (as
in “free speech” and also as in “free beer”) source code editor and Notepad
replacement that supports several languages. Running in the MS Windows
environment, its use is governed by GNU General Public License.
Based on the powerful
editing component Scintilla, Notepad++ is written in C++ and uses pure Win32
API and STL which ensures a higher execution speed and smaller program size. By
optimizing as many routines as possible without losing user friendliness,
Notepad++ is trying to reduce the world carbon dioxide emissions. When using
less CPU power, the PC can throttle down and reduce power consumption,
resulting in a greener environment.
Pros
·
Distraction-free
interface
·
Auto-completion feature
·
Plugin options for
extended functionalities.
Cons
·
Can be difficult to get
used to for beginners
·
No support for Mac.
Komodo Edit
Komodo
Edit is one of two
editors released by the same label. They offer a simple, open-source editor
with a variety of extensions and language support.
It is free to download.
 Komodo isn’t one for a flash interface either but is simple
to use.
Komodo isn’t one for a flash interface either but is simple
to use.
Pros
·
Easy-to-grasp coding
interface
·
Available for Mac,
Windows, and Linux
·
Impressive language
support.
Cons
·
No autocompletion by
default
·
Visual settings are
difficult to find and change.
Creating Your First HTML Webpage
First off, you need to
open your HTML editor, where you will find a clean white page on which to write
your code.
From there you need to
layout your page with the following tags.
Basic Construction of an
HTML Page
These tags should be
placed underneath each other at the top of every HTML page that you create.
<!DOCTYPE html> — This tag specifies the language you will
write on the page. In this case, the language is HTML 5.
<html> — This tag signals that from here on we are
going to write in HTML code.
<head> — This is where all the metadata for the page
goes — stuff mostly meant for search engines and other computer programs.
<body> — This is where the content of the page goes.
Further Tags
Inside the <head>
tag, there is one tag that is always included: <title>, but there are
others that are just as important:
<title>
This is where we insert
the page name as it will appear at the top of the browser window or tab.
<meta>
This is where
information about the document is stored: character encoding, name (page
context), description.
Let’s try out a basic <head> section
<head>
<title>My first website</title>
<meta charset="UTF-8">
<meta name="description" content="This
is description of my first website">.
<meta name="author" content="Iulian">
</header>
How to adding Content
Next, we will make <body> tag.
The HTML <body> is where we add the content which is designed for viewing by
human eyes.
This includes text, images, tables, forms and
everything else that we see on the internet each day.
How to Add HTML Headings
To Your Web Page
In HTML, headings are written in the following
elements:
<h1> <h2> <h3>
<h4> <h5> <h6>
As you might have
guessed <h1> and <h2> should be used for the
most important titles, while the remaining tags should be used for sub-headings
and less important text.
Search engine bots use this order when deciphering which
information is most important on a page
My first Heading
On a new line in the
HTML editor, type:
<h1>Welcome to My
Page</h1>
And hit save. We will save this file
as “index.html” in a new folder
called “My website.”
My first Text in HTML
Adding text to our HTML
page is simple using an element opened with the tag <p> which creates a new paragraph.
We place all of our regular text inside the element <p>.
When we write text in
HTML, we also have a number of other elements we can use to control the text or make it appear
in a certain way.
Other Key Elements
They are
as follows:
|
Element |
Meaning |
Purpose |
|
<b> |
Bold |
Highlight
important information |
|
<strong> |
Strong |
Similarly to
bold, to highlight key text |
|
<i> |
Italic |
To denote
text |
|
<em> |
Emphasised
Text |
Usually used
as image captions |
|
<mark> |
Marked Text |
Highlight
the background of the text |
|
<small> |
Small Text |
To shrink
the text |
|
<strike> |
Striked Out
Text |
To place a
horizontal line across the text |
|
<u> |
Underlined
Text |
Used for
links or text highlights |
|
<ins> |
Inserted
Text |
Displayed
with an underline to show an inserted text |
|
<sub> |
Subscript
Text |
Typographical
stylistic choice |
|
<sup> |
Superscript
Text |
Another
typographical presentation style |
Don’t forget to open and close
around the text in question.
Exemples:
<p>Welcome to <em>my</em> new
website. This site will be my
<strong>first<strong> website.</p>
After that, don’t forget to SAVE and REFRESH THE PAGE in your browser to see the all the
results.
My first link in HTML
As you may have noticed,
the internet is made up of lots of links.
Almost everything you
click on while surfing the web is a link
takes you to another page within the website you are
visiting or to an external site.
Links are included in an
attribute opened by the <a> tag. This element is the first that we’ve met
which uses an attribute and so it looks different to previously mentioned tags.
The Anchor Tag
The <a> (or
anchor) opening tag is written in the format:

The first part of the attribute points
to the page that will open once the link is clicked.
Meanwhile, the second part of the attribute contains the text which will be displayed to a visitor in order to entice them
to click on that link.
Add my first image in HTML
In today’s modern digital world, images are
everything. The <img> tag has everything you need to display images on your site. Much
like the <a> anchor element, <img> also contains an
attribute.
The attribute features information for your
computer regarding the source, height,
width and alt text of the image.
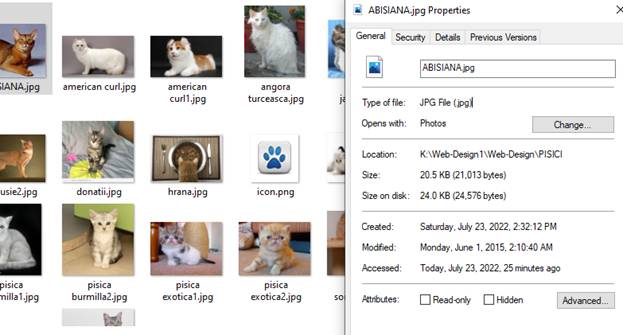
You can check the file
type of an image by right-clicking the item and selecting ‘Properties’.
You can also define
borders and other styles around the image using the class attribute. However,
we shall cover this in a later tutorial.
The file types generally
used for image files online are: .jpg,
.png, and (less and less) .gif.
Alt text is important to ensure that your site is ranked correctly on search sites and also for visually
impaired visitors to your site.
The <img> tag normally is written as follows:
<img src="ABISIANA.jpg"
alt="Brown Cat" height="20px" width="20px">
![]()
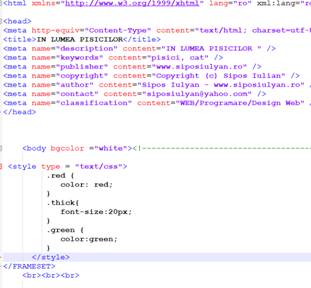
Colors in HTML
Colors are very important to give a good look and feel to your
website. You can specify colors on page level using <body> tag or you can
set colors for individual tags using bgcolor attribute.
The <body> tag has following attributes which can be used to
set different colors −
·
bgcolor − sets a color for the background of the page.
·
text − sets a color for the body text.
·
alink − sets a color for active links or selected links.
·
link − sets a color for linked text.
·
vlink − sets a color for visited links −
that is, for linked text that you have already clicked on.
HTML Color Coding Methods
There are following three different methods to set colors in your web
page −
·
Color names − You can specify color names directly like green,
blue or red.
·
Hex codes − A six-digit code representing the amount of red,
green, and blue that makes up the color.
·
Color decimal or percentage values − This value
is specified using the rgb( ) property.
Now we will see these coloring schemes one by one.
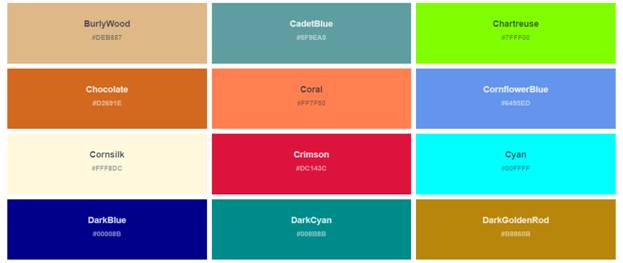
HTML Colors - Color Names
You can specify direct a color name to set text or background
color. W3C has listed 16 basic color names that will validate with an HTML
validator but there are over 200 different color names supported by major
browsers.
Note − Check a complete list of HTML
Color Name.
W3C Standard 16 Colors
Here is the list of W3C Standard 16 Colors names and it is
recommended to use them.
|
Black |
Gray |
Silver |
White |
||||
|
Yellow |
Lime |
Aqua |
Fuchsia |
||||
|
Red |
Green |
Blue |
Purple |
||||
|
Maroon |
Olive |
Navy |
Teal |
Set a
background color
Example
Here are the examples to set background of an HTML tag by color
name
Add a
color to a link
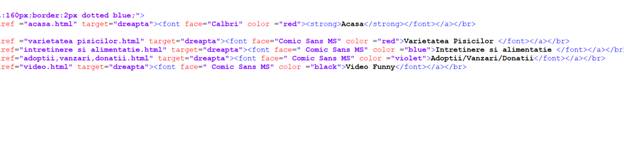
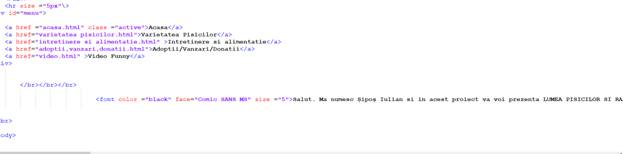
<a href
="varietatea pisicilor.html" target="dreapta"><font
face="Comic Sans MS" color ="red">Varietatea Pisicilor
</font></a></br>
HTML – Fonts
Fonts play a very important role in making a website
more user friendly and increasing content readability. Font face and color
depends entirely on the computer and browser that is being used to view your
page but you can use HTML <font>
tag to add style, size, and color to the text on your website. You can use a <basefont> tag to set all of your
text to the same size, face, and color.
The font tag is having three attributes called size,
color, and face to customize your fonts. To change any of the font attributes
at any time within your webpage, simply use the <font> tag. The text that follows will remain changed until
you close with the </font>
tag. You can change one or all of the font attributes within one <font> tag.
Note −The font and basefont
tags are deprecated and it is supposed to be removed in a future version of
HTML. So they should not be used rather, it's suggested to use CSS styles to manipulate your
fonts. But still for learning purpose, this chapter will explain font and
basefont tags in detail.
Example of CSS style
Set
Font Size
You can set content font size using size attribute. The
range of accepted values is from 1(smallest) to 7(largest). The default size of
a font is 3.
Example
<!DOCTYPE html>
<html>
<head>
<title>Setting Font
Size</title>
</head>
<body>
<font size = "1">Font size = "1"</font><br />
<font size = "2">Font size = "2"</font><br />
<font size = "3">Font size = "3"</font><br />
<font size = "4">Font size = "4"</font><br />
<font size = "5">Font size = "5"</font><br />
<font size = "6">Font size = "6"</font><br />
<font size = "7">Font size = "7"</font>
</body>
</html>
This will produce the following result −
Font
size = "1"
Font size =
"2"
Font size = "3"
Font size = "4"
Font size =
"5"
Font size =
"6"
Font size =
"7"
Setting Font Face
You can set font face using face attribute but be
aware that if the user viewing the page doesn't have the font installed, they
will not be able to see it. Instead user will see the default font face
applicable to the user's computer.
Example
<!DOCTYPE html>
<html>
<head>
<title>Font Face</title>
</head>
<body>
<font face = "Times New Roman" size = "5">Times New Roman</font><br />
<font face = "Verdana" size = "5">Verdana</font><br />
<font face = "Comic sans MS" size =" 5">Comic Sans MS</font><br />
<font face = "WildWest" size = "5">WildWest</font><br />
<font face = "Bedrock" size = "5">Bedrock</font><br />
</body>
</html>
This will produce the following result –
TimesNewRoman
Verdana
ComicSansMS
WildWest
Bedrock

Setting Font Color
You can set any font color you like using color attribute.
You can specify the color that you want by either the color name or hexadecimal
code for that color.
<!DOCTYPE html>
<html>
<head>
<title>Setting Font Color</title>
</head>
<body>
<font color = "#FF00FF">This text is in pink</font><br />
<font color = "red">This text is red</font>
</body>
</html>
This
will produce the following result −
This text is pink
This text is red
Example
HTML – Frames / IFrames
HTML frames are used to divide your browser window into multiple
sections where each section can load a separate HTML document. A collection of
frames in the browser window is known as a frameset. The window is divided into
frames in a similar way the tables are organized: into rows and columns.
Disadvantages of Frames
There are few drawbacks with using frames, so it's never
recommended to use frames in your webpages −
·
Some smaller devices cannot cope with frames often because their
screen is not big enough to be divided up.
·
Sometimes your page will be displayed differently on different
computers due to different screen resolution.
·
The browser's back button might not work as the
user hopes.
·
There are still few browsers that do not support frame technology.
Creating Frames
To use frames on a page we use <frameset> tag instead of
<body> tag. The <frameset> tag defines, how to divide the window
into frames. The rows attribute of <frameset> tag
defines horizontal frames and cols attribute defines vertical
frames. Each frame is indicated by <frame> tag and it defines which HTML
document shall open into the frame.
Note − The <frame> tag deprecated in HTML5. Do not
use this element.
Example

The <frameset> Tag Attributes
Following are important attributes of the
<frameset> tag −
|
Sr.No |
Attribute & Description |
|
1 |
cols Specifies how many columns are contained in
the frameset and the size of each column. You can specify the width of each
column in one of the four ways − Absolute values in pixels. For example, to
create three vertical frames, use cols = "100, 500, 100". A percentage of the browser window. For
example, to create three vertical frames, use cols = "10%, 80%,
10%". Using a wildcard symbol. For example, to
create three vertical frames, use cols = "10%, *, 10%".
In this case wildcard takes remainder of the window. As relative widths of the browser window. For
example, to create three vertical frames, use cols = "3*, 2*,
1*". This is an alternative to percentages. You can use relative
widths of the browser window. Here the window is divided into sixths: the
first column takes up half of the window, the second takes one third, and the
third takes one sixth. |
|
2 |
rows This attribute works just like the cols
attribute and takes the same values, but it is used to specify the rows in
the frameset. For example, to create two horizontal frames, use rows
= "10%, 90%". You can specify the height of each row in the
same way as explained above for columns. |
|
3 |
border This attribute specifies the width of the
border of each frame in pixels. For example, border = "5". A value
of zero means no border. |
|
4 |
frameborder This attribute specifies whether a
three-dimensional border should be displayed between frames. This attribute
takes value either 1 (yes) or 0 (no). For example frameborder = "0"
specifies no border. |
|
5 |
framespacing This attribute specifies the amount of space
between frames in a frameset. This can take any integer value. For example
framespacing = "10" means there should be 10 pixels spacing between
each frames. |
Browser Support for Frames
If a user is using any old browser or any browser, which does not
support frames then <noframes> element should be displayed to the user.
So you must place a <body> element inside the
<noframes> element because the <frameset> element is supposed to
replace the <body> element, but if a browser does not understand
<frameset> element then it should understand what is inside the
<body> element which is contained in a <noframes> element.
You can put some nice message for your user having old browsers.
For example, Sorry!! your browser does not support frames. as
shown in the above example.
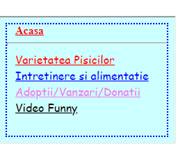
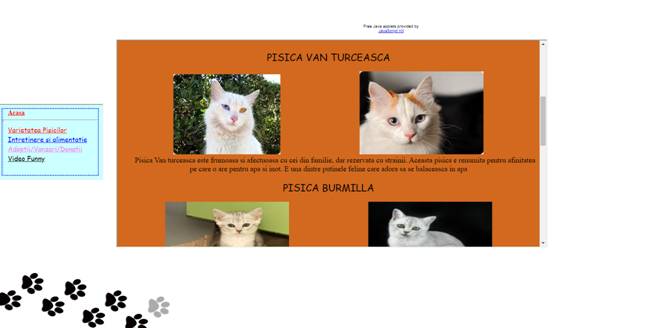
Frame's name and target attributes
One of the most popular uses of frames is to place navigation bars
in one frame and then load main pages into a separate frame.
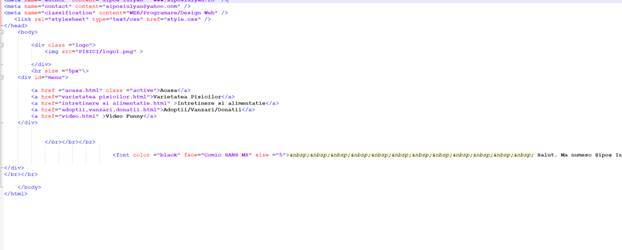
Let's see following example where a test.htm file has following
code −

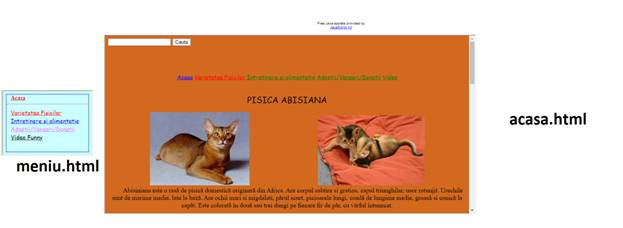
Here, we have created two columns to fill with two frames. The
first frame is 251 pixels wide and height 180 px and FRAMEBORD 20, will contain
the navigation menu bar implemented by meniu.html file.
The second column fills in remaining space and will contain the
main part of the page and it is implemented by acasa.html file.
For all the three links available in menu bar, we have mentioned
target frame as main_page, so whenever you click any of the links
in menu bar, available link will open in main page.
Following is the content of meniu.html
file

Following is the content of acasa.html file −
You can define an inline frame with HTML tag <iframe>.
The <iframe> tag is not somehow related to <frameset> tag, instead,
it can appear anywhere in your document. The <iframe> tag defines a
rectangular region within the document in which the browser can display a
separate document, including scrollbars and borders. An inline frame is used to
embed another document within the current HTML document.
The src attribute is used to specify the URL of
the document that occupies the inline frame.
Example
<!DOCTYPE html>
<html>
<head>
<title>Pisici IFrame</title>
</head>
<body>
<p>Document content here...</p>
<iframe src = "/pisici/acasa.html" width = "555" height = "200">
Sorry your browser does not support inline frames.</iframe>
<p>Document content here...</p>
</body>
</html>
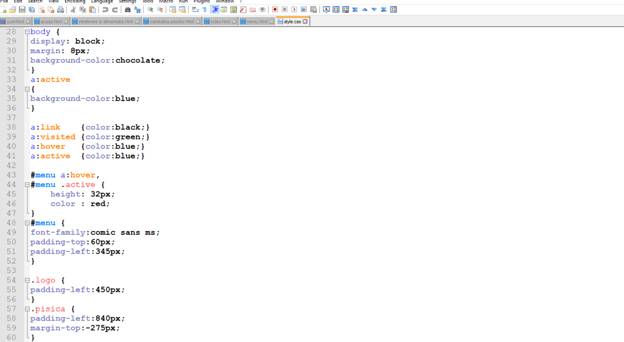
HTML - Style Sheet
Cascading Style
Sheets (CSS) describe how documents are presented on screens, in print, or
perhaps how they are pronounced. W3C has actively promoted the use of style
sheets on the Web since the consortium was founded in 1994.
Cascading
Style Sheets (CSS) provide easy and effective alternatives to specify various
attributes for the HTML tags. Using CSS, you can specify a number of style
properties for a given HTML element. Each property has a name and a value,
separated by a colon (:). Each property declaration is separated by a
semi-colon (;).
Example
First let's consider an example of HTML document which makes use
of <font> tag and associated attributes to specify text color and font
size −
Note − The font tag deprecated and it is
supposed to be removed in a future version of HTML. So they should not be used
rather, it's suggested to use CSS styles to manipulate your fonts. But still
for learning purpose, this chapter will work with an example using the font
tag.

You can use CSS in three ways in your HTML document −
·
External Style Sheet − Define style sheet rules in a separate .css file and
then include that file in your HTML document using HTML <link> tag.
·
Internal Style Sheet − Define style sheet rules in header section of the
HTML document using <style> tag.
·
Inline Style Sheet − Define style sheet rules directly along-with the
HTML elements using style attribute.
Let's see all the three cases one by one with the help of suitable
examples.
External Style Sheet
If you need to use your style sheet to various pages, then its
always recommended to define a common style sheet in a separate file. A
cascading style sheet file will have extension as .css and it
will be included in HTML files using <link>
tag.
Example
Consider we define a style sheet file style.css which
has following rules −
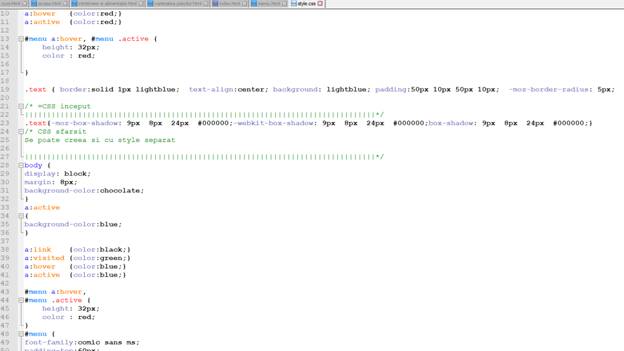
Here we defined three CSS rules which will be applicable to three
different classes defined for the HTML tags. I suggest you should not bother
about how these rules are being defined because you will learn them while
studying CSS. Now let's make use of the above external CSS file in our
following HTML document −
Internal Style Sheet
If you want to apply Style Sheet rules to a single document only,
then you can include those rules in header section of the HTML document using
<style> tag.
Rules defined in internal style sheet overrides the rules defined
in an external CSS file.
Example
Let's re-write above example once again, but here we will write
style sheet rules in the same HTML document using <style> tag
Inline Style Sheet
You can apply style sheet rules directly to any HTML element
using style attribute of the relevant tag. This should be done
only when you are interested to make a particular change in any HTML element
only.
Rules defined inline
with the element overrides the rules defined in an external CSS file as well as
the rules defined in <style> element.
Example
Let's re-write above example once again, but here we will write
style sheet rules along with the HTML elements using style attribute
of those elements.
Let’s build un website
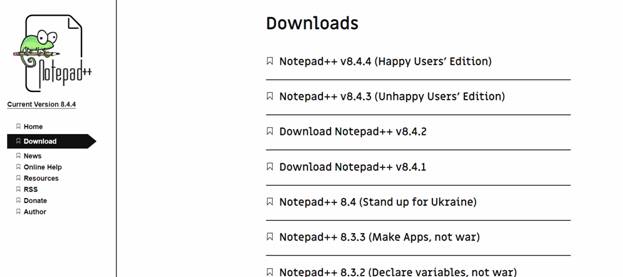
Download a editor
The first time we have to download an editing program, I recommend
the Notepadd++ program, it is easier to use and does not consume many
resources. But the best program would be Visual Code, it automatically
completes the lines of code.
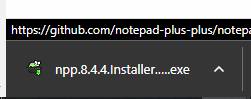
Access the following link and download the Notepadd++ program
https://notepad-plus-plus.org/downloads
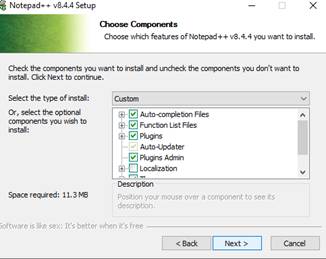
Installing an editing program
After choosing the desired version of the program, download it and
then install it. Installing this program is very simple.
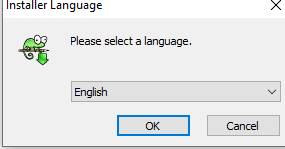
The first time we select the language for installation and after
that we click on NEXT until the END.
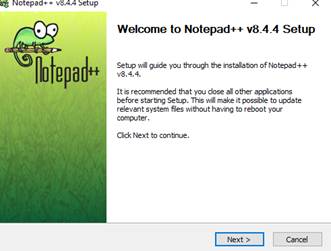

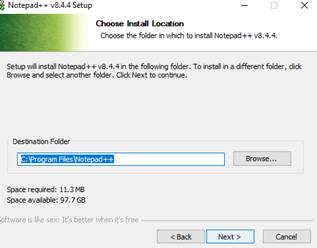
Here we click on NEXT
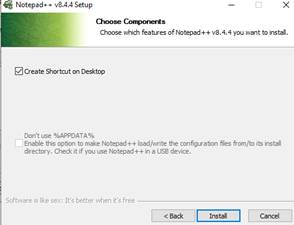
Here we click to Create Shortcut on Desktop
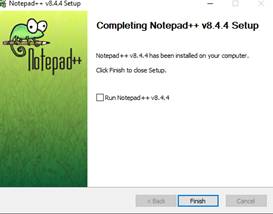
At the end of the installation, click to uncheck the automatic
start of the program and select finish.
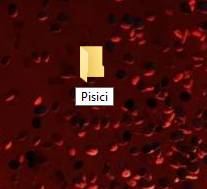
Creating our project
After installing an editing program, create a new folder on the
desktop with the name of our project and enter it.
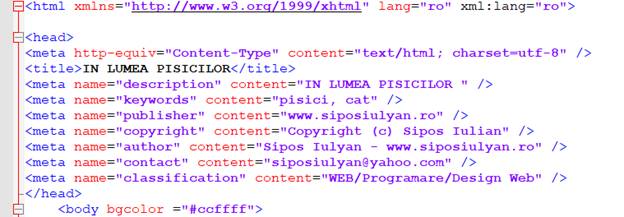
Creation of the first page of
the site
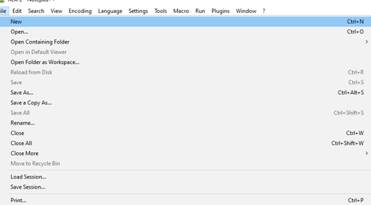
We open the Notepadd++ program that we installed in the previous
step and select from the File menu, the New option or we can press the CTRL + N
keys simultaneously to create a new document.
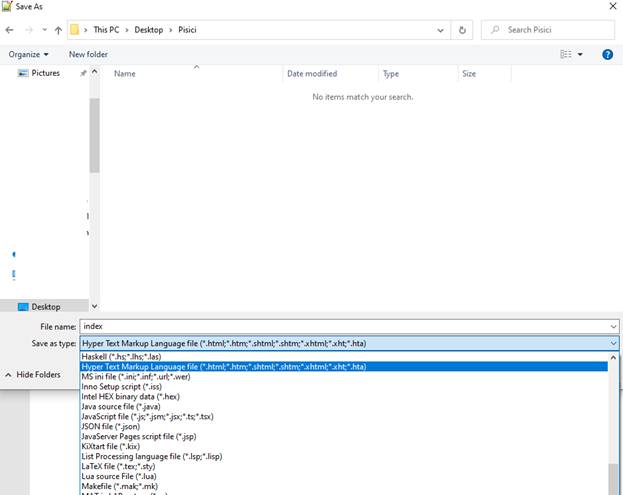
The next step is to save the
document in HTML format.
For
this, we enter the File menu from
the menu again and save the document as HTML
in the newly created folder under the name of index.html.
After
creating the index.html file, we can already write our code.
To create our website we will
follow the documentation above.
<!DOCTYPE html> — This tag specifies the language you will
write on the page. In this case, the language is HTML 5.
<html> — This tag signals that from here on we are
going to write in HTML code.
<head> — This is where all the metadata for the page
goes — stuff mostly meant for search engines and other computer programs.
<body> — This is where the content of the page goes.
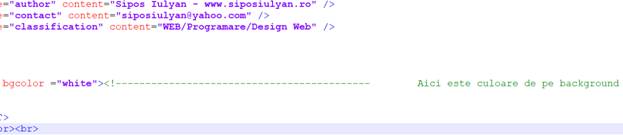
Set a
background color
All modern browsers support the following 140
color names (click on a color name, or a hex value, to view the color as the
background-color along with different text colors):
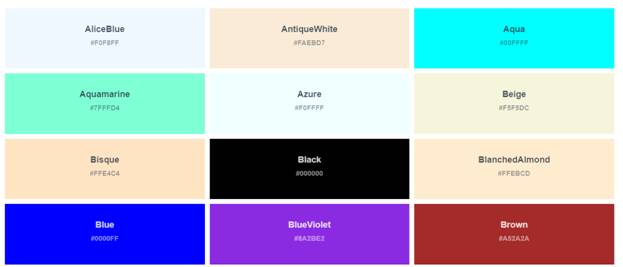
To set a
background for color we use this TAG: <body bgcolor
="red"> and
select a color from above or from :
https://www.w3schools.com/colors/colors_names.asp
Exemple:

And don’t forget to close this
HTML and BODY tags: </html> and </body>
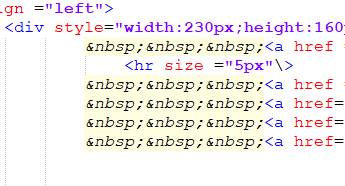
Create first
IFrame (Meniu )
To
create first IFrame we use <IFRAME > TAG and after that we
create a meniu.html document to insert meniu links.
![]()
Here
we can align the IFrame in center position and we give a name to make more easy
to see it and after that we set the dimension with this TAGS: width and height and a FRAMEBORDER to
look nice everything.
Create a meniu to website
Firt time we
open un editor ( Notepadd++ ) and we make a new file and after that we save him
at meniu.html.
In meniu page we add the
same TAGS from index.html because is the same
website and all page need this TAGS to work perfect.
Adding a space in HTML
To add a space
in HTML we use this TAG: ( no brake space )
Create links in meniu
To create a
link in meniu we use : < a href =”page.html”> Pagina </a> TAG and after this tag
we use a “TARGET” to open link. This taget is must be same to know in what
IFRAME is open.

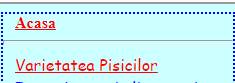
If we whant to
have colors and some style we can use some fonts and colors.


Creating the second IFRAME
To create the
second IFRAME we open index.html and
add this line after first line with first Iframe.
<IFRAME
src="acasa.html" name="main_page" width="1040"
height="500" frameborder="10"
align="middle">
</IFRAME> and
don’t forget to close IFRAME TAG.

Here we can set a
dimensions and position to second IFRAME.
Exemple
After we edit a file in NOTEPADD++, don’t forget to SAVE !
Create acasa.HTML page
Open your
editor program and create acasa.html file.
After that we
copy again first codes with HTML BODY, and other TAGS from another page.
Adding a logo to your website.
A logo may not
be the entirety of your brand identity, but it is certainly the most visible
and recognizable part of it. As an extension of your company’s purpose and
mission, your logo is a powerful and poignant way to represent your business to
the world and showcase your abilities, strengths, and what makes you different
at a glance. To help you leverage this important symbol as effectively as
possible, we’ve put together this guide detailing what a logo is, why it’s so
important, and how you can create one of your own.
What is a logo?
A logo is a
visual representation of your business, brand, product, or service. Made of
colors, shapes, icons, and a typeface, a logo is a consistent presence of your
brand across all platforms, both in print and digitally. It helps customers
quickly identify your brand.
What is
the point of a logo?
While you may not think about your
logo — or other company’s logos — every day, the fact that you notice, recognize,
and remember them is precisely why they’re important for your business. The
three major reasons why you need a logo are:
 It helps your company stand out
There is certainly no shortage of
competitors out there. A memorable logo ensures that you appear head and
shoulders above the others. Similarly, it helps create a great first impression
that customers will remember later on when it comes time to buy your products
or use your services.
![]() It helps build brand recognition and
awareness
It helps build brand recognition and
awareness
Creating brand awareness is the
first big hurdle that many companies navigate. After all, how can customers
come to your company if they don’t know you’re an option? An identifiable and
unique logo helps establish brand awareness by creating a visual representation
to which your potential customers can connect and easily remember. This, in
turn, builds brand recognition: As your logo continues to make its mark,
customers will build connections between the logo they recognize and the
products and services you offer.
![]() It communicates key
information about your business
It communicates key
information about your business
As an extension of your brand
identity, your logo sums up what your customers need to know about your
business. Whether you want to literally represent your offerings or communicate
your company’s core values, your logo is a powerful way to reinforce your
brand’s purpose across all mediums from business cards to Twitter profiles.
How is a logo used?
Logos appear across a variety of
digital and print materials to instantly connect customers to your company. Some
places you’ll see a logo used include:
·
Business cards: Among the most
standard uses for a logo, business cards typically feature logos printed on one
or both sides. You can use an online
business card maker to
easily add your logo and contact information to a modern design that reflects
your business.
·
Print collateral: Print collateral
covers a wide range of materials, such as brochures, flyers, and postcards.
Your logo placed prominently on this material immediately associates what’s
written on the flyer with your company.
·
Website: Whether you work
with a website developer or use a service
like Namecheap’s Site Maker, your logo is a key way to identify your business
online. The logo will be found in several places on the website, including near
the menu toward the top and in the footer on the bottom.
·
Official communications: A company logo
helps identify messages issued formally by your company. This could be a logo
on a press release, a presentation, or an investor deck.
·
Social media: Across Facebook,
Twitter, Instagram, and other social media platforms, you can use your logo, or
the brand mark portion of your logo (more on that below), to enforce your brand
image across the Internet. Take a look at Namecheap’s
Facebook page as
an example: You’ll find our logo as the main profile photo, easily identifying
this page as our official Facebook presence.
Logo examples and what makes them great


Photo by wu yi on Unsplash Photo by Jurij Kenda on Unsplash
Create
a logo with Canva

https://www.canva.com/create/logos/
Designing a logo doesn’t have to be daunting. Canva's
logo maker provides all of the ingredients you need to create a custom logo,
fast – and free. Learn how to design a logo online with ease.

Logo
design made easy
Your logo is the face of your business. Start your new
venture on the right foot with a professional logo.
No design experience? No problem. Canva’s logo maker and editor is made for non-designers: Simply
drag and drop.
When you’re finished, you can download your new logo—or
print it on business cards, letterheads and more. The options are endless.